Film editing
Editing your footage into a short film is when all the work you have completed so far starts to come together. It is beneficial to create a workflow for editing. This is a step-by-step outline of the process you will follow to edit your film in way that allows you to focus on one main task at a time.
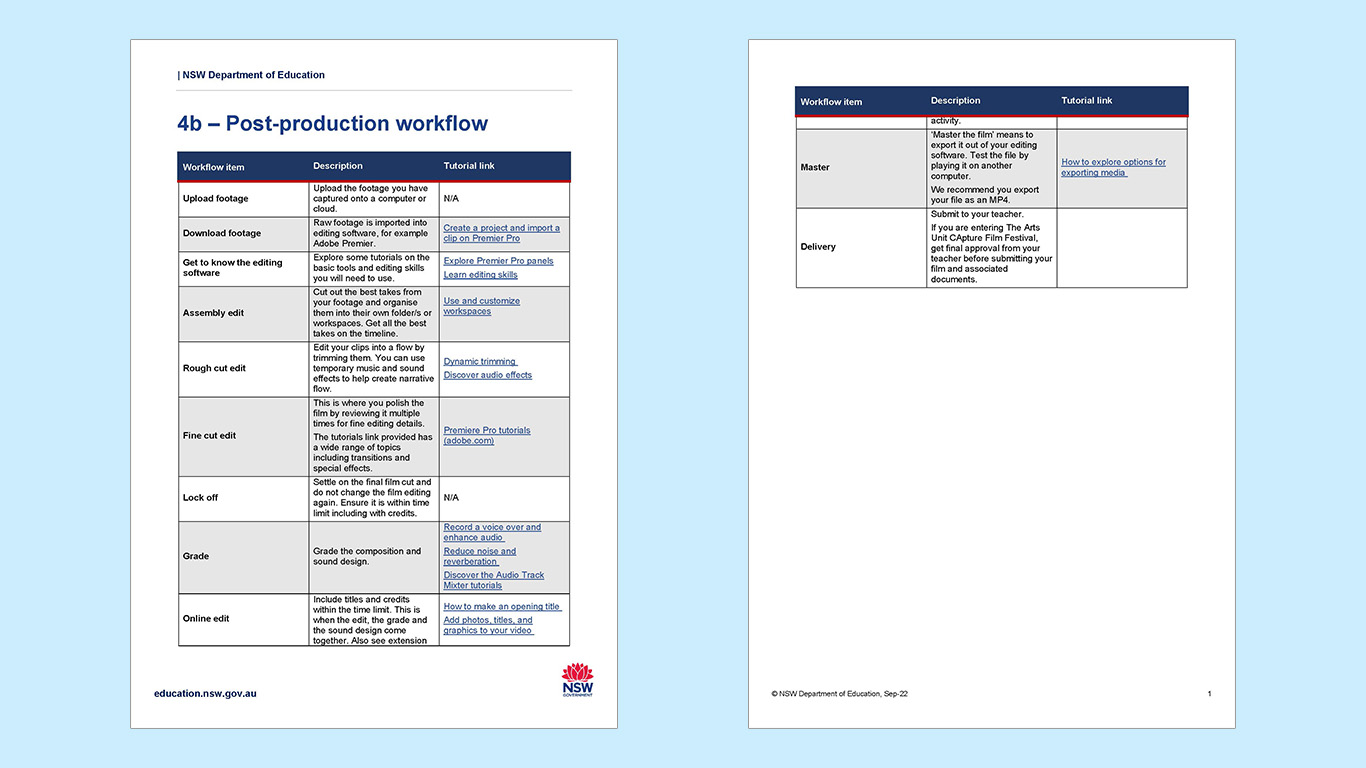
Here is a sample workflow with tutorials on how to complete this step of the process.
- Upload footage
-
Upload the footage you have captured onto a computer or cloud.
- Download footage
-
Raw footage is imported into editing software, for example Adobe Premier.
- Get to know the editing software
-
Explore some tutorials on the basic tools and editing skills you will need to use.
- Assembly edit
-
Cut out the best takes from your footage and organise them into their own folder/s or workspaces. Get all the best takes on the timeline.
- Rough cut edit
-
Edit your clips into a flow by trimming them. You can use temporary music and sound effects to help create narrative flow.
- Fine cut edit
-
This is where you polish the film by reviewing it multiple times for fine editing details.
The tutorials link provided has a wide range of topics including transitions and special effects.
- Lock off
-
Settle on the final film cut and do not change the film editing again. Ensure it is within time limit including with credits.
- Grade
-
Grade the composition and sound design.
- Online edit
-
Include titles and credits within the time limit. This is when the edit, the grade and the sound design come together. Also see extension activity.
- Master
-
‘Master the film’ means to export it out of your editing software. Test the file by playing it on another computer.
We recommend you export your file as an MP4.
- Delivery
-
Submit to your teacher.
If you are entering The Arts Unit CApture Film Festival, get final approval from your teacher before submitting your film and associated documents.
Extension activity
Animate your opening title to include in your short film. Here are a range of online tutorials that may assist you in completing this activity.